It is back to school season. That means preparing daily packed lunches and snacks. I sure you will agree that we always need some help and ideas on that department. If you are dealing with food restrictions, the challenge doubles, right?
Before food allergies were known in our household, we go thru loaves of bread like crazy. As a mom of four, I consider a sandwich a lifesaver. This lunch box staple is easy to prepare, a favorite among the kids and is very versatile. Not to mention, bread is readily available and very affordable.
When we have to eliminate wheat, dairy, egg, soy, nut and peanuts from our diet, one of the foods that the kids missed terribly was bread. I tried buying some gluten free bread but most of the gluten free brands contain either egg or soy which they can’t have. If ever I find a brand that met all their requirements, it was very pricey and tasted worse than a stale bread. Of course, my children didn’t eat it. A total waste of time and money!
Not to feel defeated, I looked for gluten free bread mixes. I came across King Arthur Gluten Free Flour Bread Mix, 18 oz .
.
For someone who hasn’t made a yeast based bread before, the instructions found on the back of the box seemed quite easy to follow. So I took the plunge and bought a box to try.
For someone who hasn’t made a yeast based bread before, the instructions found on the back of the box seemed quite easy to follow. So I took the plunge and bought a box to try.
The original instructions mentioned that the bread needs 4 eggs and milk. I decided to substitute flax milk for the regular milk. In place of the eggs, I used a flax goo made with 4 Tbs. flaxmeal and 12 Tbs. lukewarm water.
After I combined all the ingredients, I smoothed out the top and let it proofed. Make sure to use a timer and keep an eye on the dough. Depending on your home’s temperature, the dough may rise early than the suggested time.
According to the box, baking time is approximately 55-60 minutes. I have noticed that my bread was ready after a full hour. Also, I suggest the use of an instant read thermometer to check the internal temperature. This makes sure that the inside of the bread is done.
Once the internal temperature confirmed that the bread is done, remove it from the baking pan as soon as possible. The steam from the bread will make the sides soggy if the loaf stayed inside the pan. If the container was well greased, the loaf will slide right off. Sometimes, it may need some help. Use a bread knife to loosen the sides before turning it upside down to release.
No matter how tempting it is, let the bread cool completely before slicing. You’re on the last step. I’m sure you don’t want to end up with a crumbled mess. Patience is a virtue.
Baking my own gluten free vegan bread may be a little more time consuming. The result is worth every penny and effort.
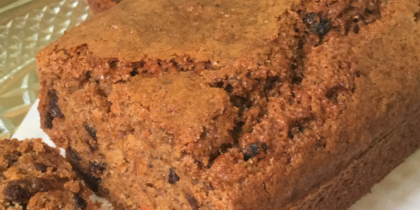
After using King Arthur’s brand a few more times, I found out that the end product is very reliable. The taste and texture is close to its gluten filled counterpart. The crust is hard and crunchy while the inside is soft and hearty. It stays fresh at room temperature for about 3 days. A loaf never last longer than that in our home. All four children always gives it a thumbs up.
Now, it’s part of our pantry staples. Do you make your own food allergy friendly bread too? Love to hear from you.
Update! As of 2017, the King Arthur’s Gluten free line has a new packaging. Here’s what it looks like now.


.png)
