With 4 active children in the house, it is a fact, that I always need easy to prepare and healthy snacks. Oh did I mention that they are good eaters too? That is why when we started to convert to a food allergy friendly home, I am more worried on what they will have for snacks than regular meals. Let’s put it this way, snacks at our home include starch, protein and fruits too.
Since I am still in the learning / experimenting stage of baking wheat, dairy, soy and egg free healthy breads, muffins and snack cakes, I now rely on gluten free and allergy friendly mixes to fill in the starch they need. While working with mixes is often a hit/miss situation texture wise, as long as the end product tastes good, my kiddos will not complain. After all, it’s supposed to be just a snack right?
Anyway, this snack or appetizer recipe turned out as a surprise hit. The breadstick mix is very affordable ($2.89 a box). Plus it only required few extra ingredients that are already in the fridge. A little warning though, this is quite addictive.

(Note: This post contains affiliate links. That means I get a commission when you purchase using the link. While no extra cost to you, it helps me with the costs of maintaining the website.)
For the Breadsticks, I used Chebe Garlic-Onion Gluten Free Breadstick Mix. Since the instructions on the box ask for eggs, milk and cheese, I decided to use these ingredients instead.
1 box of Chebe Breadstick Mix
1 Tbs. Extra Virgin Olive Oil
1 Tbs. Canola Oil
1/4 cup Rice milk or flax milk
2 Tbs. Flax Seed Meal
6 Tbs. water (lukewarm)
1 cup Daiya Cheddar Style Shreds
1. Preheat oven to 375 degrees.
2. In a small bowl, mix flaxseed meal and water. Set aside.
3. With a stand mixer running on low, make the dough by combining the Breadstick mix, oils, flaxseed mixture and Daiya cheddar.
4. Slowly drizzle with milk.
5. Mixture will look more like soft sand which is fine.
6. Knead the dough for about 5 minutes or until smooth.
7. Divide the dough and roll into sticks. The thinner the better.
8. Place into ungreased baking sheet lined with parchment paper.
9. Bake for 20-25 minutes.
Note:
– The bread sticks do not brown well so check during the minimum baking time to avoid over baking.
– These have a crunchy texture and not soft, bread like.
– I found out that it is better to make the bread sticks thinner to avoid a gooey center.
– Perfect for dipping.
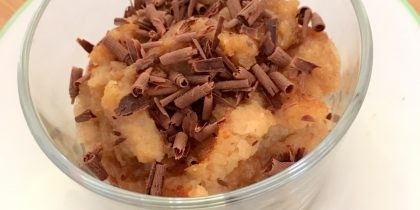
For the Baked Bean Dip, I did a little cheating this time. I used my favorite brand of canned baked beans and pureed it. Surprisingly, it complemented the bread sticks quite well.
Hugs,


.png "The Collective 2021")

I'm gone to convey my little brother, that he should also visit this blog on regular basis to get updated from latest information.
Look at my weblog weblink
Woаh! I'm really loving the template/theme of this site. It's simρle, уet effectivе.
A lot of timeѕ іt's challenging to get that "perfect balance" between user friendliness and visual appearance. I must say that you've
done a ѕuрerb job with this. In adԁition, thе blog
loads verу quick for me on Fiгefох.
Exсeptional Blog!
Review my web-site :: epstein barr virus diseases